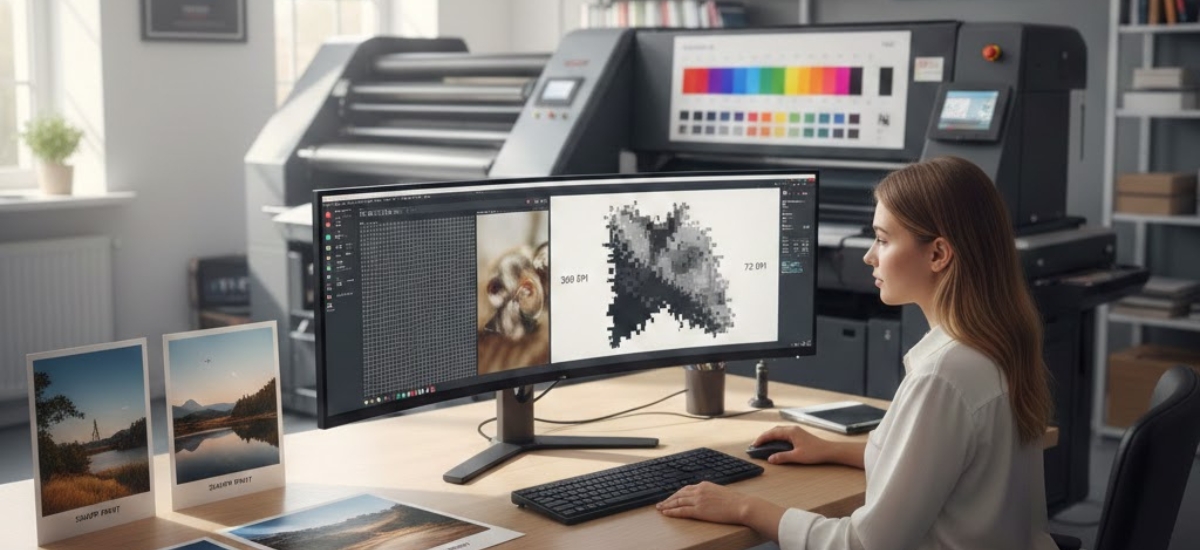
You’ve probably heard that images need to be “high resolution” for printing, but what does that actually mean? And why does your printer ask for “300 DPI” files when your photo looks perfectly sharp on screen at 72 DPI?
Resolution confusion causes more print quality issues than almost any other technical factor. Blurry business cards, pixelated posters, and fuzzy product photos often trace back to one simple problem: insufficient resolution.
Whether you’re a small business owner in the Niagara Region preparing marketing materials or a designer submitting files to a commercial printing service, understanding DPI and PPI will dramatically improve your print results. Let’s demystify these acronyms and ensure your next project prints crystal clear.
At Niagara Print Express, we help Niagara Region businesses achieve consistent, accurate print colours through expert file checks, proofs, and colour consultation.
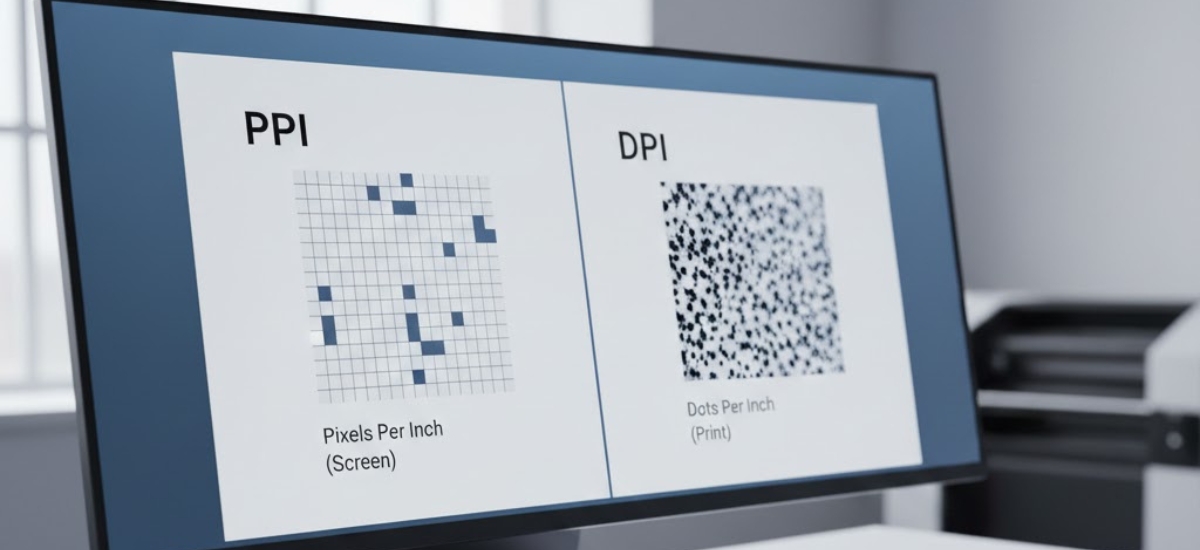
DPI vs PPI: What's the Difference?
People use DPI and PPI interchangeably, but they’re technically different measurements. Understanding the distinction helps you communicate clearly with your printing partner.
How CMYK Works
PPI measures the pixel density of digital images. When you open a photo in Photoshop or view it on your computer, you’re looking at pixels—tiny squares of colour that make up the image.
A 300 PPI image contains 300 pixels in every linear inch of the image. Higher PPI means more pixels packed into the same space, creating finer detail and smoother edges.
PPI applies to:
- Digital photographs
- Screen displays
- Images in Photoshop or other editing software
- Any image file before it's printed
DPI (Dots Per Inch)
DPI measures how many ink dots a printer can place in one linear inch of paper. Professional printers in Ontario use tiny dots of cyan, magenta, yellow and black ink to reproduce images. More dots per inch means better detail and smoother colour transitions.
DPI applies to:
- The printing device itself (printer capability)
- The actual printed output
- How fine or coarse the printed dots are
Why the Confusion?
In practical conversation, people say “DPI” when they often mean “PPI.” When your printer asks for “300 DPI images,” they really mean they need images with 300 pixels per inch. The printer then uses its own DPI capability (often 1200-2400 DPI) to reproduce those pixels using ink dots.
For practical purposes in commercial printing, just remember: your image files need to be 300 PPI to print at professional quality.
Why 300 DPI (PPI) is the Professional Standard
The 300 DPI standard isn’t arbitrary—it’s based on human visual perception and the physics of printing.
The Science of Visual Acuity
Human eyes can distinguish approximately 300 individual dots per inch when viewing something at typical reading distance (12-18 inches). Beyond 300 DPI, most people can’t perceive additional detail without magnification.
This creates the perfect balance:
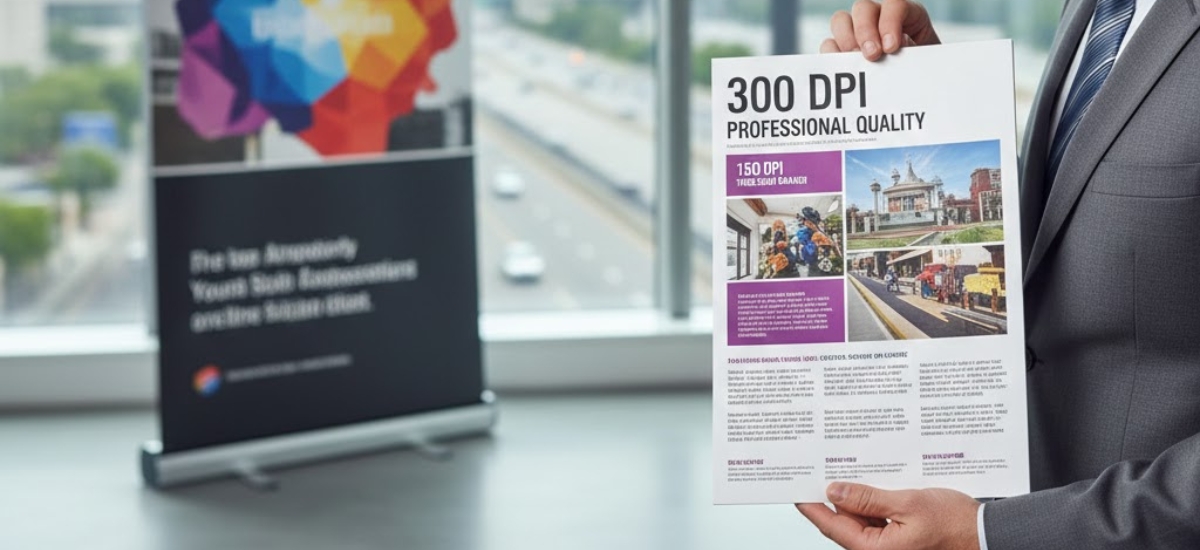
- Below 300 DPI: Visible quality loss, pixelation, jagged edges
- At 300 DPI: Sharp, professional, publication-quality results
- Above 300 DPI: Minimal visible improvement, but much larger file sizes
Think of it like this: if you printed at 150 DPI, you could see the individual pixels forming the image. At 300 DPI, those pixels blend seamlessly into smooth, continuous tones and sharp edges.
The Math Behind Print Size
Understanding the relationship between resolution, pixel dimensions and print size is crucial. Here’s the formula:
Print Size (inches) = Pixel Dimensions ÷ DPI
Example 1: Standard Photo
- Image size: 3000 x 2000 pixels
- Resolution: 300 DPI
- Maximum print size: 10" x 6.67"
- Result: Sharp, professional quality
Example 2: Same Photo at Lower Resolution
- Image size: 3000 x 2000 pixels
- Resolution: 150 DPI
- Maximum print size: 20" x 13.33"
- Result: Visible pixelation and blur
The same image file prints at different sizes depending on DPI. Lower the DPI and the image prints larger, but quality suffers proportionally.
Common Resolution Mistakes (And How to Fix Them)
At Niagara Print Express, we see these resolution errors regularly. Learning to spot and fix them saves time and prevents disappointment.
Mistake #1: Using Web Images for Print
This is the most common mistake by far. You find a perfect image on your website or social media and want to use it in a brochure. Problem: web images are typically 72 DPI and sized for screens, not print.
The Reality Check:
- Image from website: 800 x 600 pixels at 72 DPI
- Prints well at: 2.67" x 2" (basically business card size)
- You wanted to print it at: 8" x 6" (will look pixelated and blurry)
The Fix:
You can’t truly add resolution to a low-res image, but you can:
- Use the image at a smaller size in your layout
- Find a higher-resolution version of the same image
- Hire a photographer to reshoot
- Choose a different image from stock photo sites at 300 DPI
Mistake #2: Enlarging Images in Design Software
Placing a small image in InDesign or Illustrator and scaling it up doesn’t add resolution—it just makes the existing pixels bigger.
Example from a Pelham Client: A local restaurant wanted to print menu posters. They took a photo with their smartphone, imported it into Word and stretched it to fill an 11×17 page. The image looked fine on screen but printed blurry because they’d enlarged a 12-megapixel phone photo beyond its optimal print size.
The Fix:
- Check effective resolution in your design software
- In InDesign: look at the Links panel—it shows effective PPI
- If effective PPI is below 300, don't scale the image larger
- Shoot or source higher resolution images from the start
Mistake #3: Assuming "HD" or "High Quality" Means Print-Ready
A 1920 x 1080 “HD” image sounds impressive and looks great on screens. But for printing:
- HD image: 1920 x 1080 pixels
- At 300 DPI prints well at: 6.4" x 3.6"
- At 150 DPI prints acceptably at: 12.8" x 7.2"
HD is a video/screen standard, not a print standard.
The Fix:
- Ignore marketing terms like "HD" or "High Quality"
- Check actual pixel dimensions
- Calculate print size using the formula above
- Source images with dimensions appropriate for your intended print size
Mistake #4: Not Checking Resolution Until After Printing
A Niagara-based real estate agent once printed 1,000 promotional postcards featuring a gorgeous property photo. When the cards arrived, the image looked soft and slightly blurry—not terrible, but noticeably less sharp than the rest of their materials.
The issue? The photographer had sent web-optimized images instead of high-resolution originals. The mistake cost $350 in reprints and delayed their marketing campaign by a week.
The Fix:
- Check image resolution during the design phase
- Request print proofs for important projects
- Ask your printing service to review files before full production
- At Niagara Print Express, we offer free pre-press file checks to catch resolution issues early
Resolution Requirements for Different Print Projects
Not every print project requires 300 DPI. Here’s a practical guide to resolution needs based on viewing distance and application.
300 DPI: Standard for Most Printing
Use 300 DPI for:
- Business cards (viewed up close)
- Brochures and flyers (held in hand)
- Postcards and direct mail
- Product catalogues
- Magazine and newspaper ads
- Pocket folders and presentation materials
- Any printed piece viewed from 12-18 inches
This is the safe standard for professional printing services throughout Ontario.
150-200 DPI: Acceptable for Large Format
Use 150-200 DPI for:
- Posters viewed from 3-5 feet away
- Trade show displays and banners
- Yard signs and outdoor signage
- Wall graphics and murals
- Vehicle wraps
- Retail window displays
When something is viewed from a distance, your eye naturally sees less detail. A banner hanging 10 feet in the air doesn’t need the same resolution as a business card you’re holding.
72-100 DPI: Billboards and Very Large Prints
Use 72-100 DPI for:
- Billboards viewed from 50+ feet
- Building wraps and very large banners
- Stadium signage
- Highway signage
A billboard image at 300 DPI would create an enormous, unwieldy file with no visual benefit.
The Viewing Distance Rule
A simple rule of thumb: resolution requirements decrease as viewing distance increases.
- Viewing distance 1 foot or less = 300 DPI minimum
- Viewing distance 3-5 feet = 150-200 DPI acceptable
- Viewing distance 10+ feet = 100-150 DPI acceptable
- Viewing distance 50+ feet = 72-100 DPI acceptable
How to Check and Set Resolution in Your Files
Knowing what resolution you need is one thing—ensuring your files actually have it is another. Here’s how to check and adjust resolution in common design software.
Checking Resolution in Adobe Photoshop
- Open your image
- Go to Image > Image Size
- Look at the "Resolution" field (should say 300 Pixels/Inch)
- Check the Width and Height in inches—this is your maximum print size
- Make sure "Resample" is UNCHECKED if you're just checking current resolution
Warning: Changing resolution with “Resample” checked will add or remove pixels. Increasing resolution this way doesn’t truly improve quality—it just interpolates (guesses) what the new pixels should be. Always source high-resolution images rather than artificially upsampling.
Checking Resolution in Adobe InDesign
- Open the Links panel (Window > Links)
- Select your placed image
- Look at the "Effective PPI" in the Link Info section
- If it shows less than 300 PPI, your image is either too small or scaled too large
The “Effective PPI” accounts for any scaling you’ve done in your layout. An image might be 300 PPI at its original size, but if you’ve enlarged it 200%, the effective resolution drops to 150 PPI.
Setting Resolution for New Files
In Photoshop (creating new documents):
- File > New
- Set Resolution to 300 Pixels/Inch
- Choose dimensions based on your final print size
In Illustrator (importing images):
- Always import high-res images at 300 DPI
- Avoid scaling images up beyond their original size
- Use File > Place rather than copy-paste for better control
Stock Photos and Resolution: What to Look For
When sourcing images from stock photo websites, resolution information helps you choose the right size.
Decoding Stock Photo Sizes
Stock sites typically offer images in multiple sizes:
Small (S):
sually 600-800 pixels wide
- Good for web only
- Not suitable for print unless very small (2-3 inches)
Medium (M):
Usually 1200-2000 pixels wide
- Suitable for small print applications (4-6 inches)
- Limited flexibility for cropping or enlargement
Large (L):
Usually 3000-5000 pixels wide
- Ideal for most print projects
- Prints well at 10-16 inches at 300 DPI
- Allows cropping while maintaining quality
Extra Large (XL):
6000+ pixels wide
- Best for large format printing
- Maximum flexibility for cropping
- Future-proofs your design if you need to repurpose later
For commercial printing in the Niagara Region, always purchase Large or Extra Large sizes for print projects. The cost difference is typically just a few dollars and provides crucial flexibility.
Vector Graphics: The Resolution Exception
There’s one type of graphic that doesn’t follow resolution rules: vector graphics.
Logos created in Adobe Illustrator, icons and text are usually vectors—made of mathematical paths rather than pixels. Vectors can be scaled to any size without quality loss because they’re recalculated at whatever size you need.
Vector files include:
- .AI (Adobe Illustrator)
- .EPS (Encapsulated PostScript)
- .PDF (when created from vector software)
- .SVG (Scalable Vector Graphics)
Pixel-based files include:
- .JPG (photographs)
- .PNG (web graphics)
- .TIFF (print photographs)
- .PSD (Photoshop files)
Your logo should always be provided in vector format for print. A pixel-based logo limits how large you can print it before quality degrades.
Key Takeaways: Master Print Resolution in 5 Points
Getting resolution right doesn’t require complex calculations or technical expertise. Focus on these fundamentals:
- Use 300 DPI for standard printed materials viewed at reading distance—this is the professional standard
- Check effective resolution in your design software before sending files to print
- Web images at 72 DPI don't work for print—source high-resolution images from the start
- Calculate maximum print size using the formula: Pixel Dimensions ÷ 300 = Print Size in inches
- Viewing distance matters—large format prints viewed from afar can use lower resolution
Understanding resolution saves you from costly reprints, ensures professional-looking results and gives you confidence when preparing files for commercial printing services.

Professional Guidance When You Need It
At Niagara Print Express, we know that resolution can be confusing, especially when you’re balancing multiple aspects of a design project. That’s why we offer complimentary file reviews to check resolution and other technical specifications before printing begins.
Our pre-press team catches issues that could compromise print quality:
- Insufficient image resolution
- Incorrect colour modes
- Missing bleed or trim marks
- Font problems and missing links
A quick file check takes just minutes but can save you hundreds of dollars in reprints and delays.
Ready to bring your print project to life with perfect clarity and sharpness? Contact Niagara Print Express at (289) 897-9026 or email niagaraprintexpress@gmail.com for a free quote and file consultation. We’ll ensure your images print beautifully the first time.

We print almost everything!
Didn't find what you're looking for?
We print almost everything! Contact us for custom requests.
Frequently Asked Questions (FAQs)
What is the difference between DPI and PPI?
PPI (Pixels Per Inch) measures the pixel density of a digital image, while DPI (Dots Per Inch) refers to how many ink dots a printer places on paper. For print preparation, 300 PPI is the standard requirement.
Why is 300 DPI the standard for printing?
300 DPI matches the limit of human visual acuity at normal reading distance (12–18 inches). It produces sharp, professional-quality prints without unnecessarily large file sizes.
Can I print a 72 DPI image?
72 DPI images are designed for screens, not print. They may look sharp digitally but will appear blurry or pixelated when printed at larger sizes.
How do I calculate maximum print size?
Use this formula:
Print Size (inches) = Pixel Dimensions ÷ 300
For example, a 3000 × 2000 pixel image prints at 10" × 6.67" at 300 DPI.
Is 300 DPI necessary for large banners?
Not always. Large-format prints viewed from a distance can use lower resolution:
150–200 DPI for posters and banners
72–100 DPI for billboards
Viewing distance determines required resolution.
Can increasing resolution in Photoshop improve print quality?
No. Increasing resolution with “Resample” adds artificial pixels and does not improve true image quality. Always start with high-resolution images.
Add a Comment